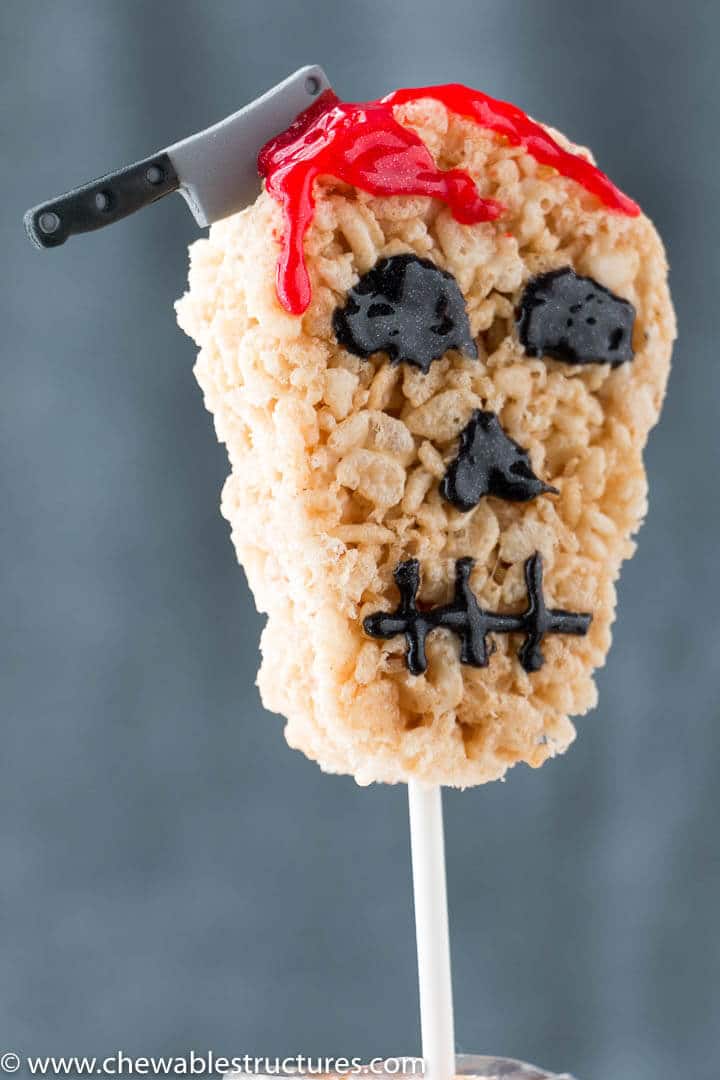
These skull-shaped Halloween rice krispie treats are so scary … scary good that is! It all starts with the perfect combination of a chewy, crunchy rice krispie treat that’s not too sweet.
Why this recipe works
- Easy recipe using simple tools (cookie cutter, treat sticks, candy decorations)
- Slightly crunchy rice krispie treat recipe that’s not too sweet
- Great as Halloween school treats since it’s a peanut-free recipe
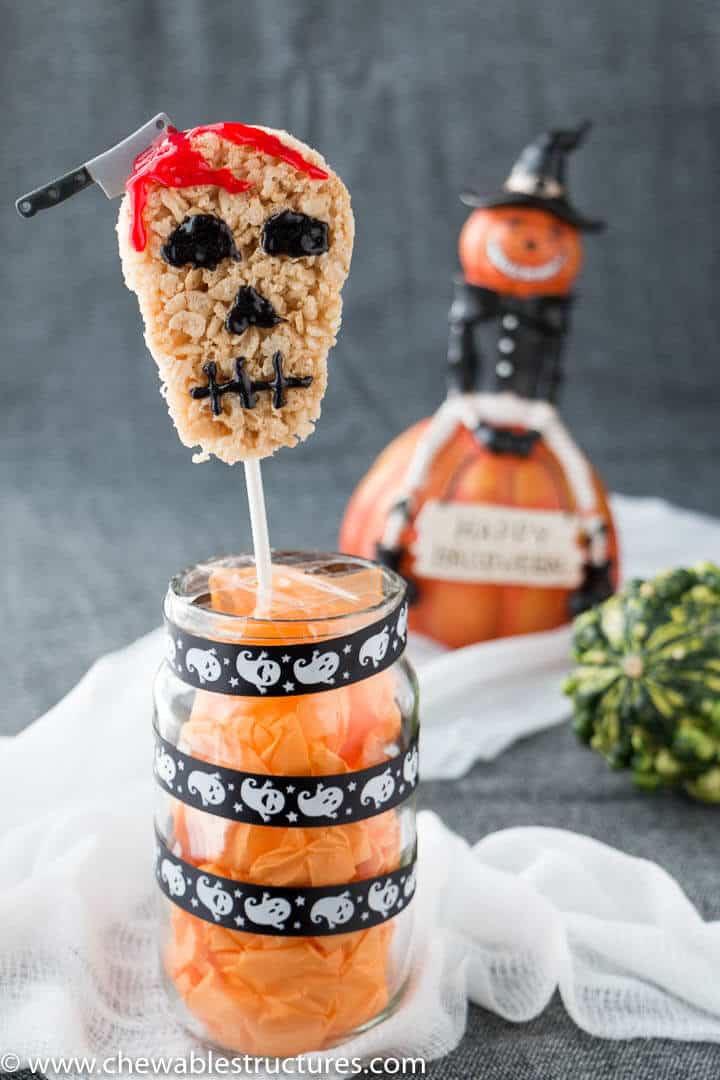
- Easily plate these spooky treats anyway you want! Stand them up vertically in a mason jar or flat on a tray.
For more deliciously spooky food recipes, check out my Halloween recipe collection! From vegetarian Halloween pizza to eyeball candy apples, there’s something perfect for every Halloween craving.
These rice krispies treats are perfect for a Halloween party, school, or any themed event during October! The combination of classic rice krispie cereal and ooey, gooey marshmallows is unbeatable.
[popout_newsletter]
You can click on the links below to jump straight to the section you need.
Helpful tips
Tip 1: Parchment paper is your best friend!
Lining the bottom of your pan ensures that your gooey Halloween rice krispie treats don’t get stuck. If you’re out of parchment paper, spread a generous amount of butter on the inside of the pan or coat the bottom with cooking spray.
Tip 2: Don’t crank up the heat!
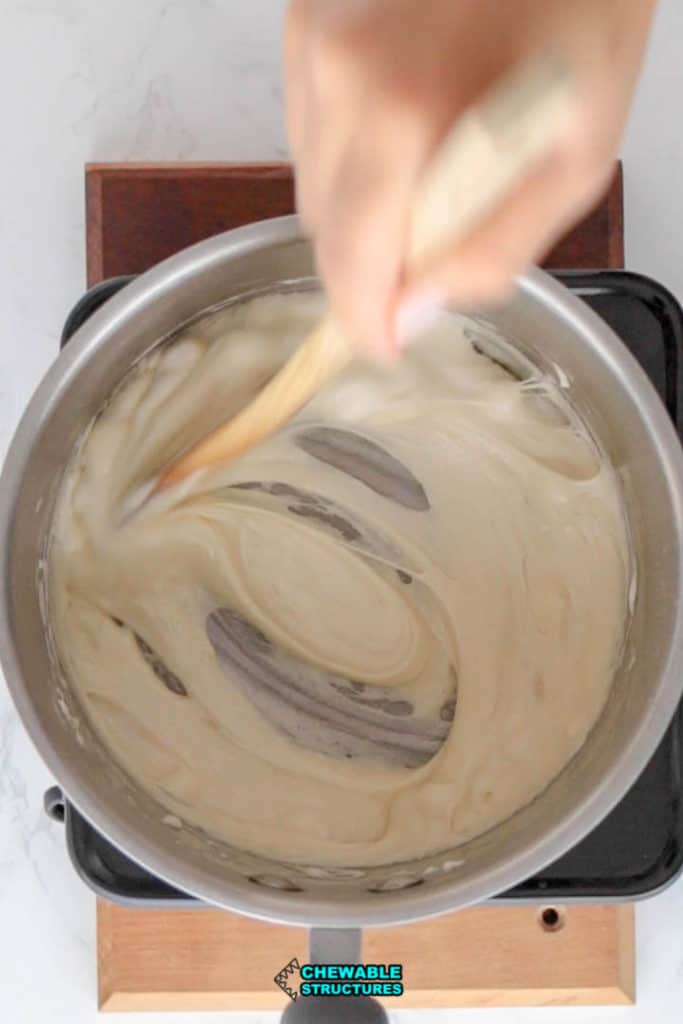
Keep your stove on low to medium heat when you’re melting the butter and marshmallows together. All of that melted butter and sugar tends to burn quickly, so be patient. Check out the below image for the correct consistency and color that you want.
Tip 3: Lightly press the treats into the pan
When you’re flattening the rice krispie treat mixture, don’t press too hard. If you use too much pressure, your rice krispies won’t turn out light and fluffy.
Tip 4: Cut out the skull shape while the rice krispies are still slightly warm
If you wait until the rice krispie treats are cold, then it will be very hard to use the cookie cutter.
Ingredients
- Rice Krispies cereal is the star of the show here! Make sure to avoid using stale cereal as it will mess with the texture of your final product.
- Mini marshmallows are easier and quicker to melt down than the full-sized ones, which is why I chose them for this recipe.
- Butter prevents the treats from getting too sticky and adds a delicious, rich flavor. You can use salted or unsalted butter for this recipe.
Equipment
I found most of these items on Amazon, Michaels, or Sur La Table.
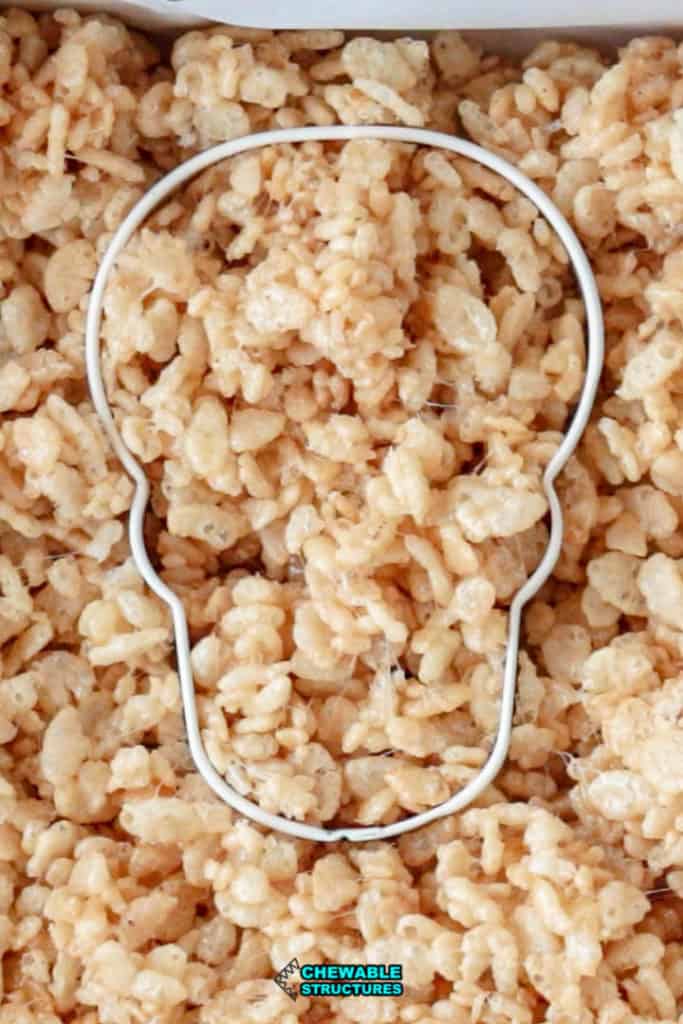
- 5-inch Skull Cookie Cutter (Amazon Affiliate link). Below is an image of the cookie cutter in action.
- Candy cleaver: I like the look of these tiny candy cleavers. I picked them up at Michaels.
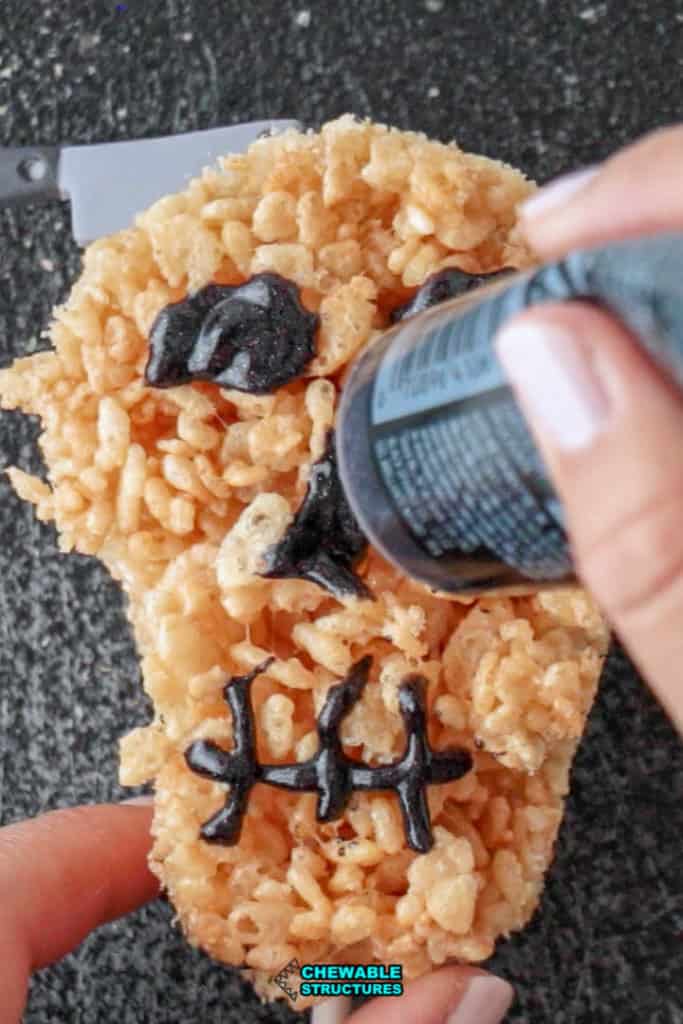
- Black Wilton Sparkle Gel to drawn on the facial features
- Red Wilton Sparkle Gel to drizzle on the red blood.
- 8” treat sticks: Try to find treat sticks that are sturdy but not too long.
Substitutions
- If you can’t get your hands on sparkle gel (or regular gel, for that matter) there are a few substitutions you can use. Melted chocolate chips or red and black candy melts would do the trick!
- Feel free to get creative with these treats. For example, you could use candy corn for the eyes or add a dash of food coloring to the marshmallow mixture to make your skulls pop!
Common questions
If your final product turned out soggy, mushy, or unmoldable, it’s probably because you used too much butter in the mixture or on your pan. The rice cereal will soak up the butter and become too moist. Make sure to only use 2 tablespoons like the recipe calls for.
To store these Halloween rice krispie treats, keep them in an airtight container at room temperature. This will help prevent them from going stale. I wouldn’t recommend refrigerating them, since it can cause the treats to harden.
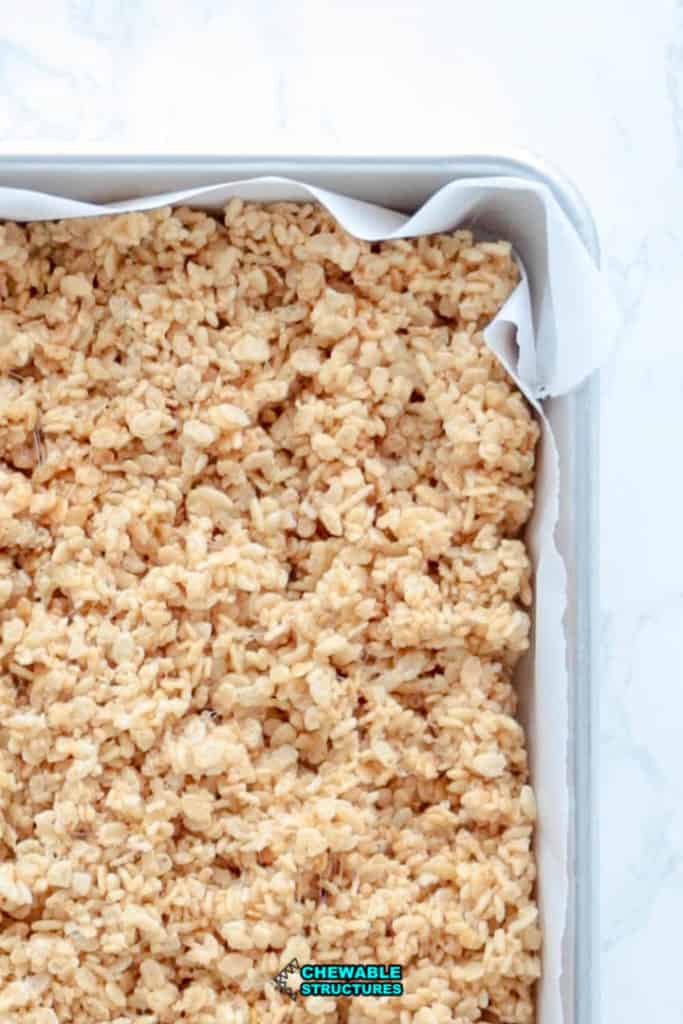
I live for a great rice krispie treat, but they have to be just right. The key to the perfect marshmallow treats is the rice krispie cereal to marshmallow ratio, like this recipe has! You want enough of the marshmallows, but not too much that it becomes a sticky mess. It should look like the below image.
Watch my recipe video
Check out my recipe video below for more tips on making these spooky, crispy treats!
Try these recipes too!
- Check out ALL of my Halloween recipes
- Vegetarian Halloween pizza that you can whip up in 15 minutes.
- How to make candy apples using a simple kit. I love that crispy thin layer of candy.
- Peanut butter and jelly sandwiches disguised as ghosts
- Chocolate brownie haunted house topped with shaved almond roof shingles.
Subscribe to Chewable Structures
*** All products purchased by me. Please note that all my links should be considered affiliate links, which helps support this content. Thanks for your support!
Scary Halloween Rice Krispie Treats
Ingredients
- 2 tbsp butter
- 3 cups mini marshmallows
- ½ tsp vanilla extract
- 6 cups Rice Krispies
- Wilton black edible sparkle gel
- Wilton red edible sparkle gel
- Cleaver icing decoration
Equipments
- 8” Treat Sticks
Instructions
Make rice krispie treats
- Line a 9”x13” pan with parchment paper. Spread a thin layer of butter on the parchment paper and a wooden spatula. (This step prevent the marshmallow mixture from sticking to the pan and the wooden spoon.)
- On low to medium heat, melt butter in a large pot and add the marshmallows. Slowly stir for 2-3 minutes.
- Add vanilla. Stir until combined.
- Add the rice krispies cereal to the pot. Using a wooden spatula, carefully stir until the rice krispies are evenly coated in the delicious marshmallow mixture. Turn off the heat. Immediately transfer mixture to the pan lined with parchment paper.
- Let it cool for 1 minute. Using your hands, lightly flatten the rice krispie mixture so that the surface is level.
- While the Halloween rice krispie treats are still slightly warm, cut 8 skulls using a 3.5” skull cookie cutter. Transfer to another baking sheet to fully cool (around 20 minutes).
- When the skull is completely cooled, add the treat stick into the bottom of the skull.
Decorate the skull
- Using a sharp paring knife, cut a slit on the topside of the skull. (Watch my recipe video for a better visual). Carefully wedge the candy cleaver into the opening.
- Using black sparkle gel, pipe the eyes and mouth onto the skull.
- Using red sparkle gel, pipe red lines near the cleaver to mimic blood.
- Add the skull to a mason jar or lay flat on a tray.


Leave a Reply